Sunday, January 30, 2022

Chain of Command - BEF Drinks Cabinet

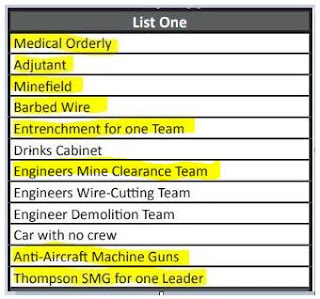
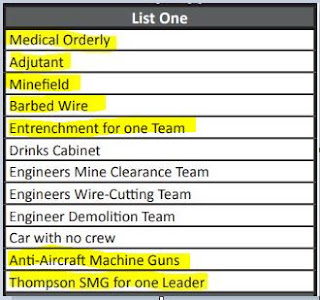
Striking the 2nd last item off of support list 1. Today I bring you the Drinks Cabinet!


Now as much as there is no actual requirement to 'have' a physical drinks cabinet, like some others...I wanted to paint one up, even if its sitting at the side of the table until used (though when used, will definately be placed for a photo-op)

One other reader provided me with some info on the one he did, but I had all of these Mantic Terrain Crates sitting there....surely something inside of one of those would work.

Then I noticed the Tavern Set.....


Yep, there are 3 of these cabinets in the set, so I snagged one.


Here it is for size comparison beside a thirsty lad.


Now as these were ment to be placed against a wall, the back of it had no pattern. 


So I cut some cardboard strips & made some wood planking for it. (yes the white glue is still drying at this point)


And here we have the finished piece.


Tha back of it looks much better now!


And again for scale..."Ere now Sgt! Your not in shock yet!"


Looking at the list, this just leaves me the car to do. I've been waiting on a shipment from First Corps, but it has yet to arrive, so I found a Citroen on Thingeverse I am currently trying to print. (Murphy's Law dictates that although my print will end later today, the actual parcel will arrive tomorrow too!)

Thanks for visiting! 

Thursday, January 27, 2022

The Trials of Goo - Sprue Goo that is.

So last October, I stumbled across a video about Sprue Goo by the Miniature Hobbyist on YouTube & the uses this fella had put it too. It was quite interesting & the link provided is of that video.

 My biggest takeaway, was the making of the plastic panels for use as basing on figures that were either snipped slotta, or those plastic ones that did not have an inherint base attached.

So after watching the video, it was off to Goodwill to snag some old cheap spoons & a rolling pin. I also bought a small cooking pan at the dollar store, as well as wax paper rolls.


With the final purchase of the Acetone, it was into the jar!


Well, this is where things go a little different from how his video portrays it.

My first batch seems to have some powdery sprue atop the goo...is this from primed sprues? Or are their different qualties of plastic sprue..I would have to say maybe to both.


So going forward I will not be using any primed sprues. I know there are many who prime the pieces while on their sprues. I can try removing the primer to see if that helps.

 I watched his video again, thinking I may have missed something, as certainly the plastic goo does not drop off my spoon, but sticks to it like a thick sludge...so it required a bit of scraping onto the sheet.


When I rolled it with the rolling pin, it got very thin, but man is it sticky! I waited the mentioned time period before trying to peel off the wax paper. Yep it was coming up with it. (Apparently the acetone hadn't evaporated enough)


My understanding thus far is that after a period of time, you need to remove the wax/parchment paper to allow the plastic to dry. Eventually my result is shown below.


Was this to be considered a failure? Well yes & no. Yes in that I was unable to use a pattern roller over it as shown in the video. But no, as I can still use this for rough ground. So grabbing a circle template & drawing circle patterns over it. 


I was then able to use scissors to cut them out.


Then glued them on washers....I originally tried using white glue, but some of them released while trimming the edges. So I reglued them with GOOP. Some would say to use superglue, but my experience with super glue, is that when it gets cold ( I am in Alberta after all) that glue releases as well. 


Once trimmed, I then used some greenstuff to seal the edges to the washer & in some cases fill some small areas that needed it. (This will certainly save money on the Greenstuff). 


So what happens with all the scrap snippings?


Well they go right back into the jar to remelt & become one with the goo for future use. I actually used some of my finished ones on the BEF figures I built from the plastic sets in my previous posts.

Certainly not giving up on this, as its more of a learning & development of what I've dabbled with so far. Scott was kind enough to save me a bunch of sprues & its my hope that I am good for a long while to work on this behind the scenes process!  The goal of course is to get it to where I can indeed use my rollers to pattern the sprue!

Thanks for following & be sure to check out his video on this as it was always a shame throwing these sprues in the trash in the past. 

Wednesday, January 26, 2022

Chain of Command - BEF Engineer Demolition Team

I've just finished the next off my Support 1 list. The Engineer Demolition Team.


Again these were sourced from the British Engineer blister & built from the Warlord Plastic British sprues.

The leftmost figure is from the Engineer blister & is metal. He holds a detonation box & is preparing to push the plunger.


The middle figure is plastic & I set him up with some leftover greenstuff shaped into some explosive charges. I then used some fine guage wire to represent the det cord.


The last figure turned out to be my favorite scratchbuild of them all.  The large satchel (obviously containing explosives) was scrounged from my many 1/35 scale backpacks & such. I added some greenstuff to the backside to make it full. The Spool of wire was made from the sprocket of a 1/72nd scale model kit that is laying around in pieces. I trimmed off the sprocket pegs, then wrapped some more of the fine guage wire around it, & also formed a handle from the same. 

This leaves me with 2 more items from Support list 1. I've just found a drinks cabinet model from one of my terrain crate boxes, which I will be showing as my next build. The Car I am still awaiting on from a First Corps order. 

Sunday, January 23, 2022

Chain of Command - BEF Wire Clearing Team

The second of my support list Engineer Teams is now completed.


Here we have the Wire Clearing Team. Consisting of 3 members, the first is a metal Warlord Games figure from the British Engineer Blister., the 2nd metal miniature may be a 1st corps figure from a gun crew. He can certainly fill that role as well if needed.


The last figure I had to build from the Warlord Games plastic sprue set. I had a bit of leftover Army Painter wire with which to use with him.


This week I will begin working on the 3rd Engineering Team. 

Thursday, January 20, 2022

Chain of Command - BEF Engineer Mine Clearing Team

Back to some miniatures, for my BEF Support. Today I bring you the Engineer Mine Clearing Team


So initially I searched for some figures, ready made, but alas, most hits I had were of those people had scratchbuilt. So it was time to dig around my various boxes. I had a couple sprues of British plastic troops purchased in one of the Warlord Game sales.


The fella holding the mine dectector is an actual metal figure from the British Engineer blister pack, which also had a couple other figures. For the kneeling figure holding the bayonet, he is made from the plastic soldier sprue. The bayonet is actually from my 1:35 model bitz box. I snipped the blade a bit, to make it not appear TOO oversized.


The last standing figure holding the shovel was also built from the plastic figure sprue. The shovel came from a British Weapons sprue (also purchased on that Warlord Games sale).

Up next will be the wire cutting team. 

Monday, January 17, 2022

Chain of Command - Minefields!

 Continuing through Support List 1, I completed the Minefield yesterday.


Once again I went with a very simple piece of felt (which does the job quite well!)


But as with the entrenchments, I had an opportunity to do something fancier. So again snagging some stl files fom Thingeverse, with 2 being available in 6" x 6". One from the previous creator (see the entrenchements post for link) which was a hollow bounding frame with some mines which when printed would be loosely strewn within it. 

Image copyright: Marcoplo from Thingeverse

There was also a solid version from this creator that had some mines, which some empty holes (which I used some of the loose mines from the previous file to fill)

Image Copyright; tyrela from Thingeverse

 So then the thought hit me... I could use the full version minefield for while it is active & then just use the border once the minefield is breached.


I had a bit of an issue with the plaster sticking to the plastic base, so would recommend roughing it up with some sandpaper prior to applying it. 


While these pieces were drying I also got to work on creating some figures to use as my various Engineering teams, which I will be starting to work on this week.