So having completed the Zuzzy rocks, it was onto some of the foam built ones I've cut with my foam wire cutter.
There are a lot of great Youtube videos of people making these & are well worth the watch for ideas.
As I started working on them I figured I would do a step-by-step of my own with the colours I chose. For these larger ones I used scrap pieces of Pink insulation foam.

Originally I was going to mount them on CD's, but then I thought...why? The goal of these was for use in Rangers of Shadow Deep & many other various games where large rocks were needed to cut down on LOS

So after painting them with black gesso, it was on to the base Ash Gray. The goal is not to completely cover the black with the gray, as you want the deep recesses to remain dark.
This is followed by scrubbed on patches of Burnt Umber. Definately using dollar store brushes for all of this scrubbing & stippling.

Next was the Burnt Sienna, which is scrubbed on sparingly. The colour looks good for where there may have been oxidizing iron bits within the rock formation.
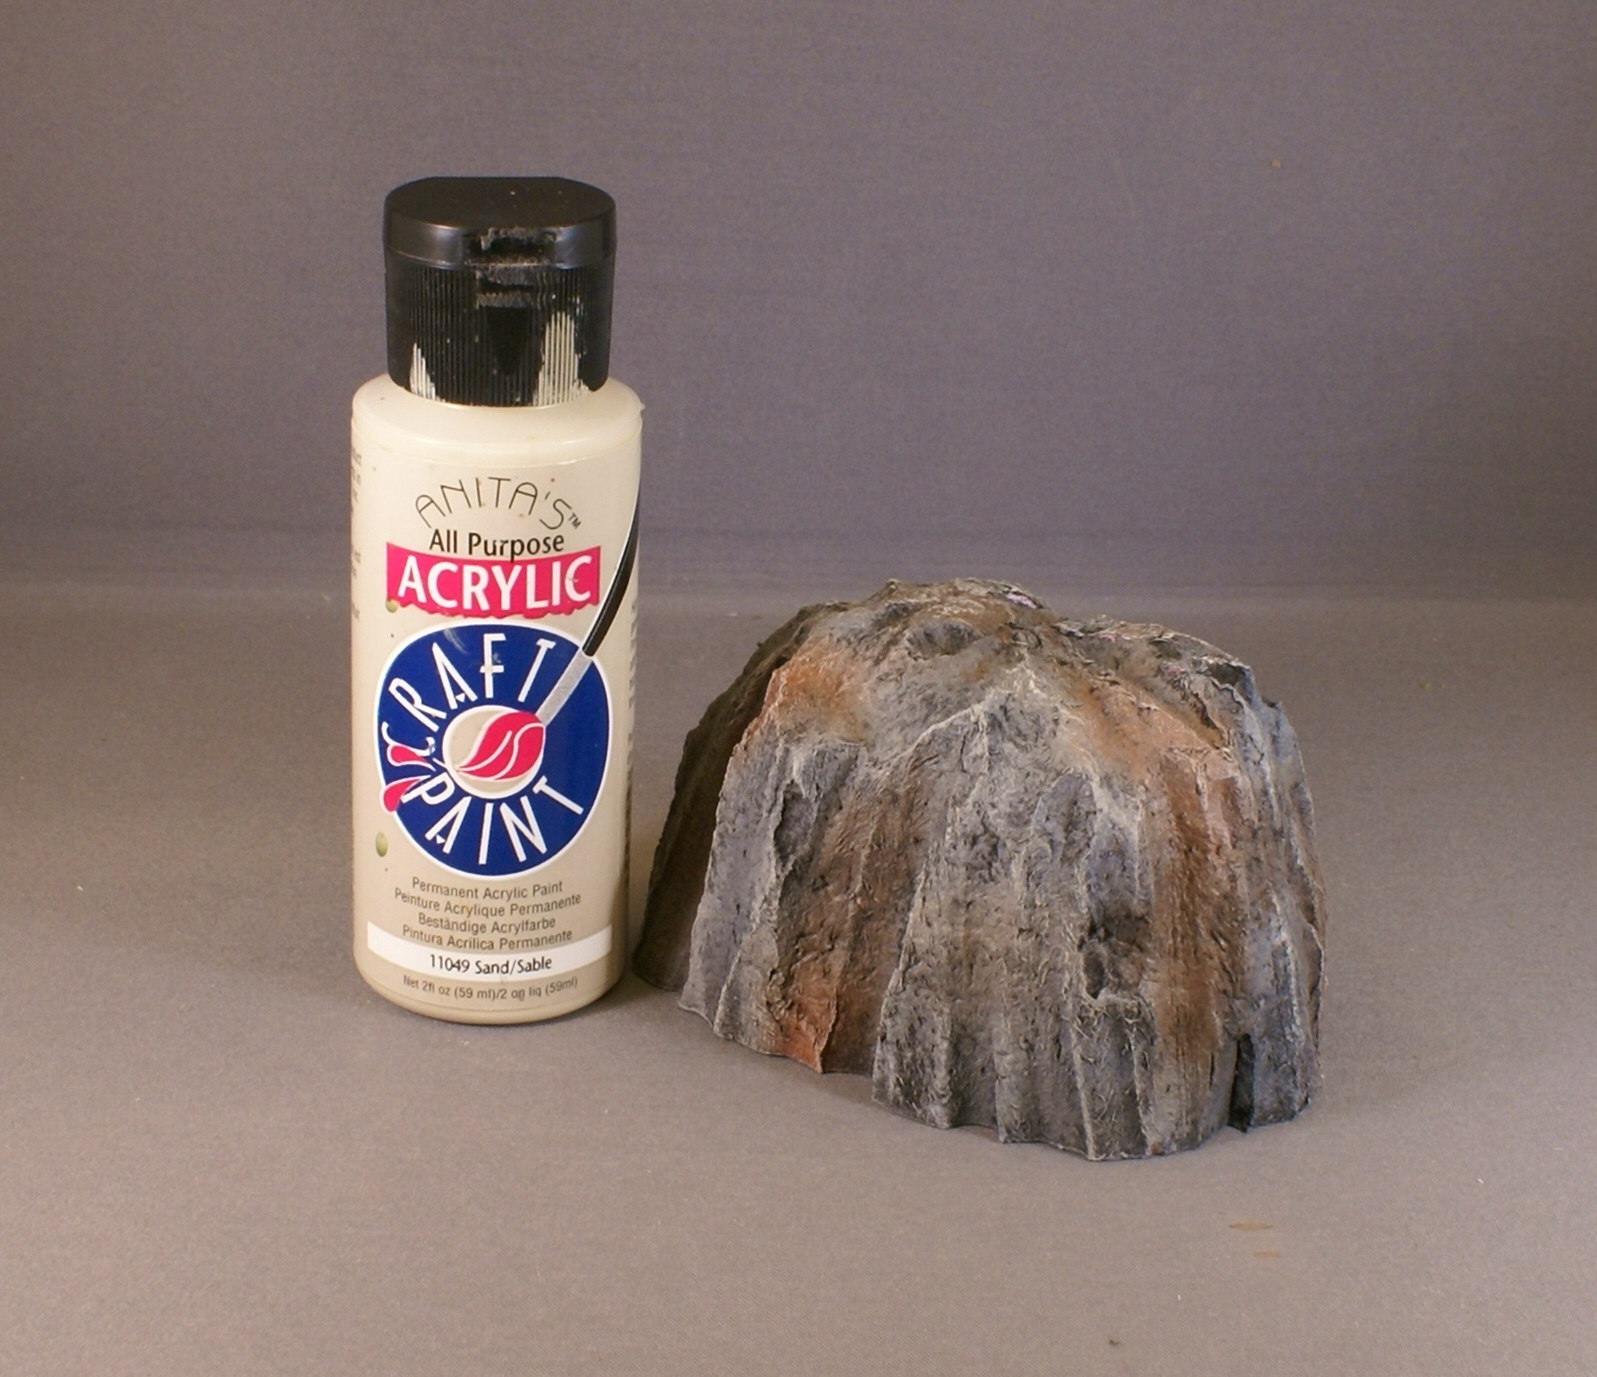
Lastly my favorite edging colour, Sand, to touch up the edges & dust across the larger patches.
And here they are completed for today. I did make 1 spire version & will likely make some more of these, which I intend to paint in Desert sand colours.

Of course we needed a figure for scale image.

Then it was onto some small rock faces that were emerging from the earth. These were made with the usual white packing foam, which isn't as durable as the pink.

I covered these ones with Mod-Podge to hopefully make them more durable after painting them grey. I guess once they are on the table & tumbling dice roll over them, we will know if it worked.

So that ended my hobby session for today. Thanks as always for visiting.
Simple but very effective 👍
ReplyDeleteThanks Matt! This is one of those projects that's been lingering in my head for some time. Nice to have started...but now, when do I stop?
DeleteThese look great and I was surprised to see just how big they were alonfsise a figure. The 'thinner' smaller ones look what I originally thought you were aiming at and I loe the many different colours used too. Maybe some green 'mold, fungus, or lcchens' would also look good on them,.
ReplyDeleteThanks Joe, I was thinking of adding some flock, licken & such to the flat surfaces of the top, we shall see, as the concern is how long it will last before coming off.
DeleteWell they have gone well! Smashing job Terry.
ReplyDeleteThanks Michael!
Delete